10. How to run Retainers on Euka
Last updated: May 19, 2026
10.1 Why Use a Retainer
A Retainer is a recurring creator partnership where you work with a fixed group of creators over time, instead of running one-off paid collaborations.
Retainers are used when predictability matters more than randomness.
Retainers help you:
Guarantee a steady flow of content from selected creators
Reduce volatility compared to single paid posts
Build a feedback loop to test, iterate, and scale winning content
Avoid restarting creator sourcing for every campaign
If your product COG is high, Retainers are especially important. Instead of paying upfront for a single post, you ensure creators commit to X videos per period, spreading risk across multiple uploads and improving ROI.
Retainers are commonly used when:
You’re launching a new TikTok Shop or new product and need guaranteed volume fast
You already know which creators convert and want to lock them in
You want repeatable testing (hooks, CTAs, formats) instead of one-off results
You need reliable content for ads, promotions, or key sales periods
10.2 How to Pick the Right Creators
Most brands start Retainers with creators who have already proven performance, including:
Top performers from free sample collaborations
Creators with strong historical GMV on your product category
Target creators from TTAM lists or internal research
Best practice:
Prioritize post rate consistency over one-time viral GMV
Select creators who already understand your product and audience
Start small (5–10 creators) and expand after validating results
Retainers work best with creators who can iterate, not just post once.
10.3 Step-by-Step: Set Up a Retainer
You can preview the creator-facing retainer page on the right at any time before sharing the link.
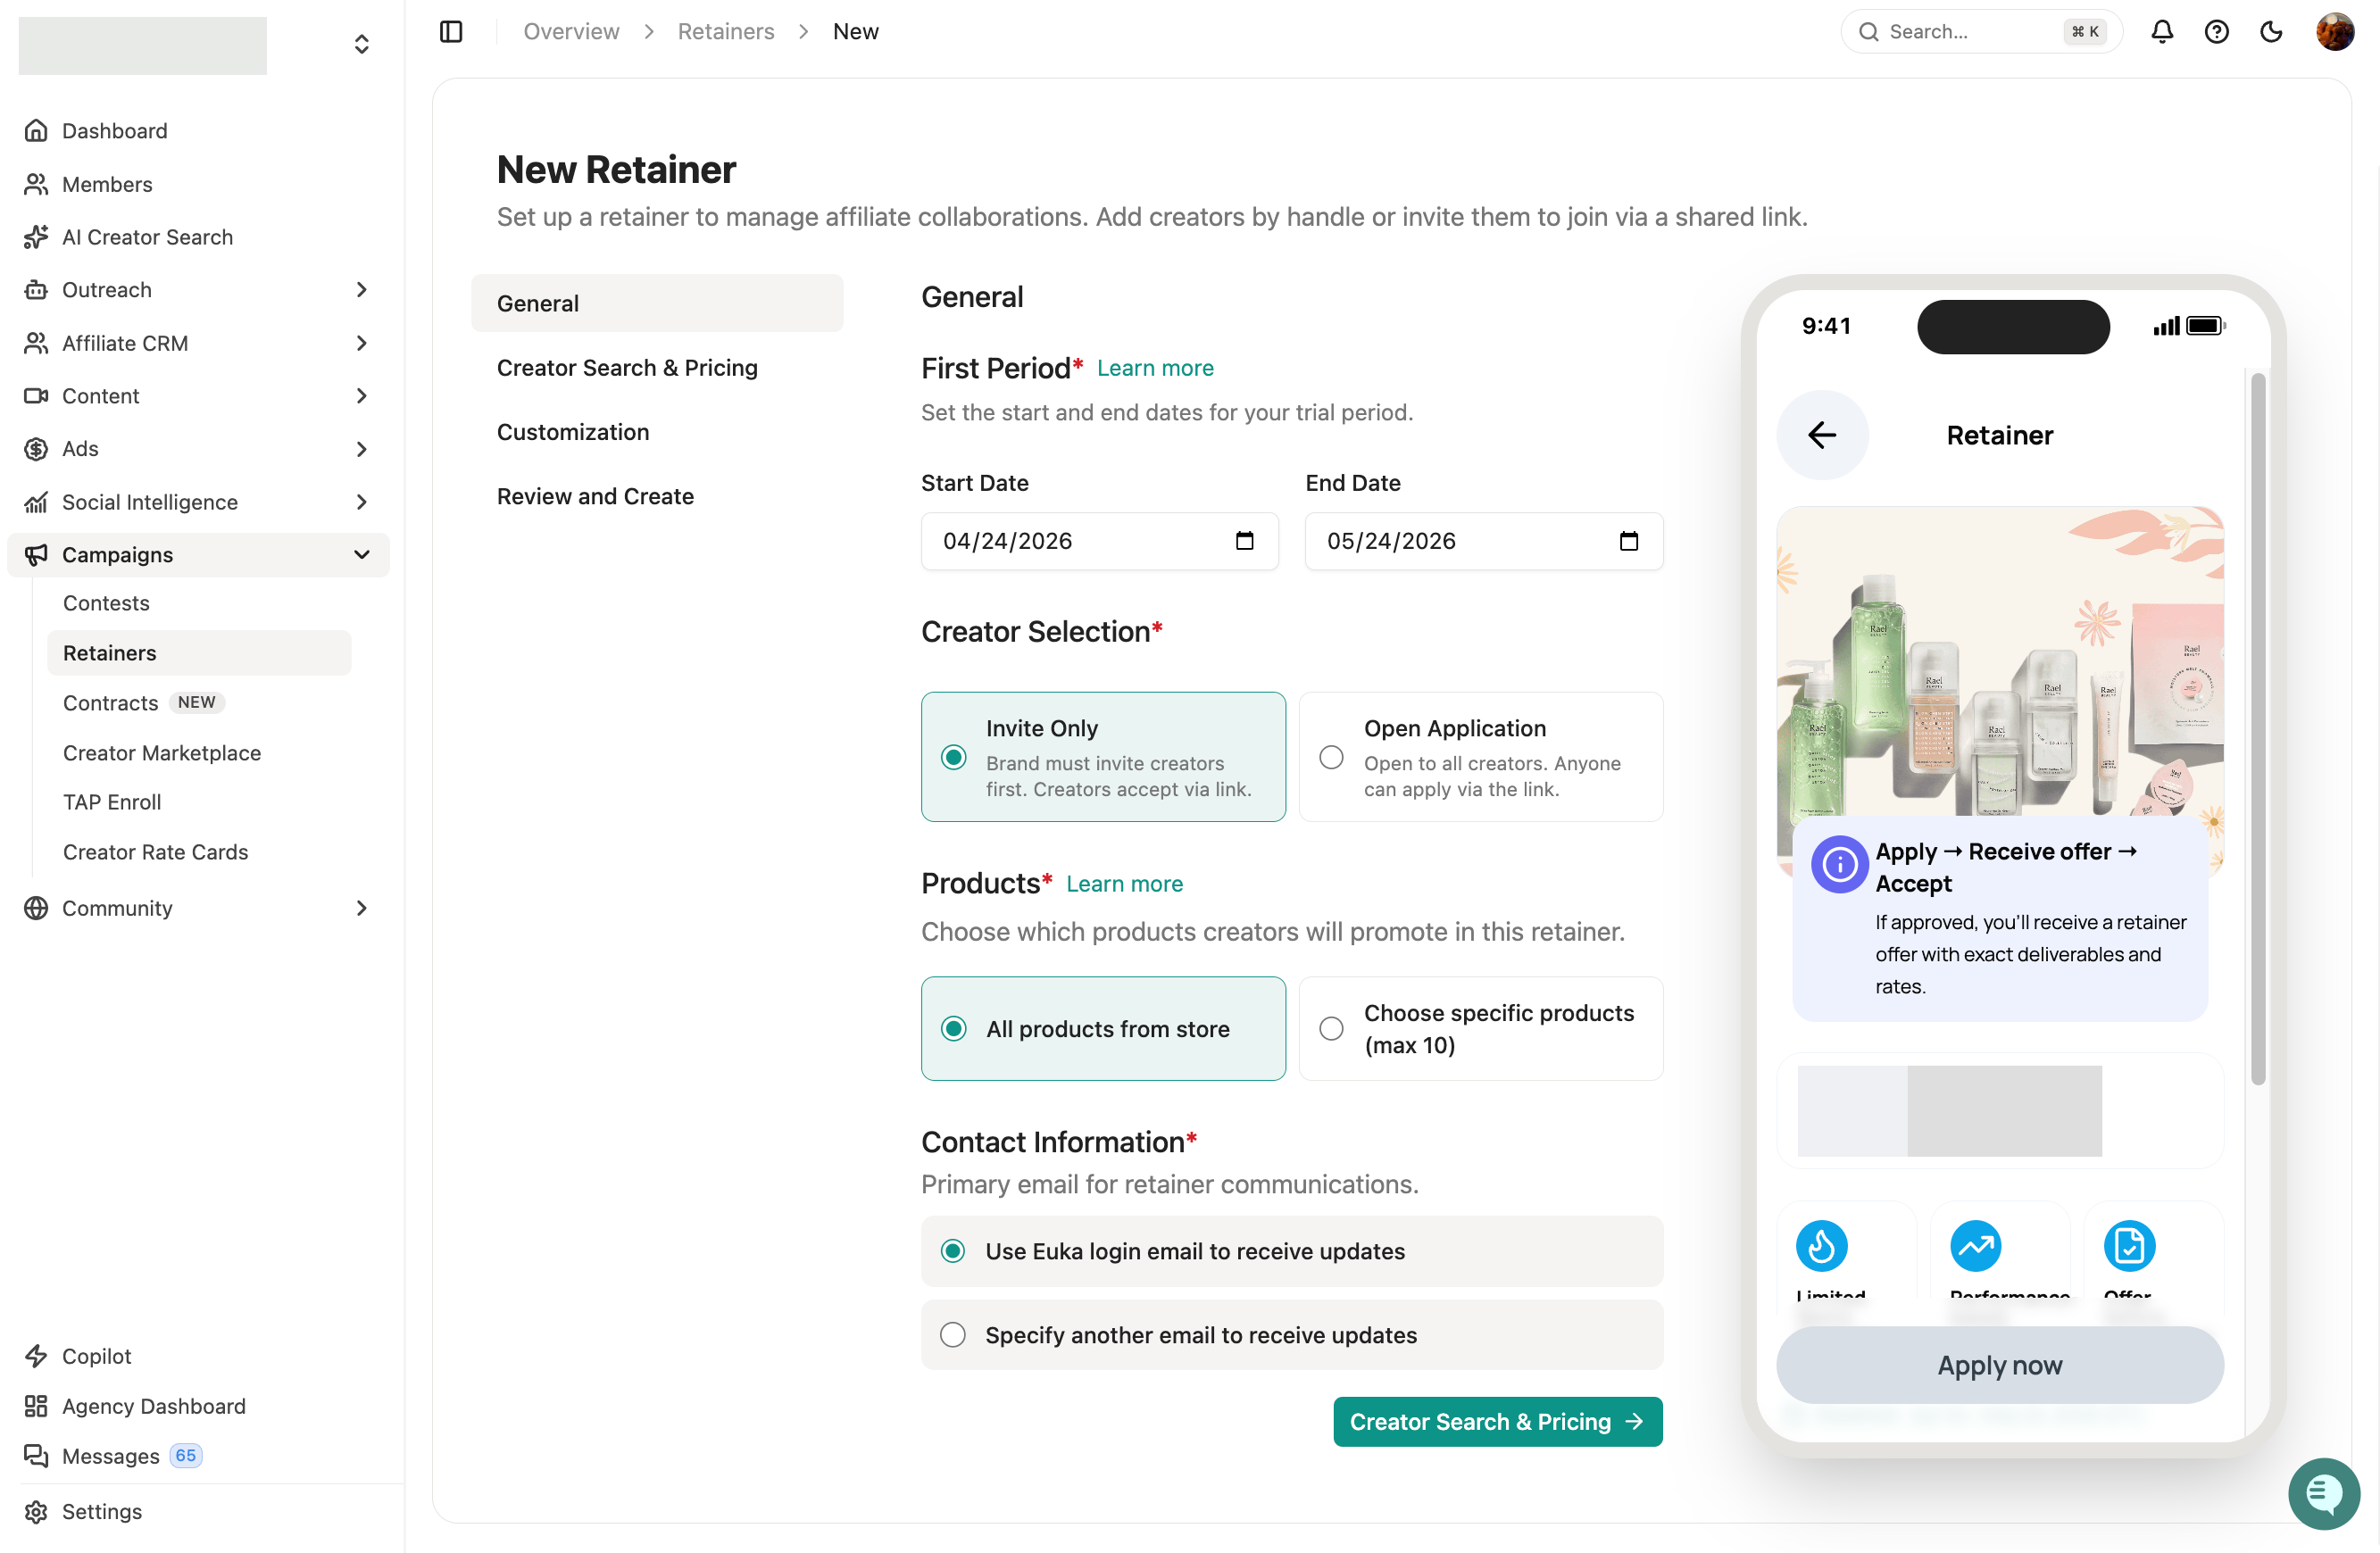
Step 1 – Set up the basics:
First Period — Set a start and end date for your first period. Start with a trial period as an interview process to evaluate creator fit. You can add more periods later for long-term collaboration.
Creator Selection — Choose Invite Only (you send invites; creators accept via link) or Open Application (any creator can apply via the link). Invite Only is recommended if you have specific creators in mind or want tighter control over who joins.
Products — Select All products from store or choose up to 10 specific SKUs. Use specific products for high-COG items or launches where you need focused promotion.
Contact Information — Choose where retainer notifications go.
This ensures you control when, who, and what gets posted—especially important for high-COG products to guarantee enough videos are delivered.
Step 2 – Invite Creators & Set Pricing
Invite creators and set their deliverables. You can skip this step and invite creators later in the dashboard.
Click + Invite Creator to search by handle and add specific creators directly.
Set custom pricing and video deliverables per creator at this stage, or configure them after the retainer is created.
Step 3 – Customize Retainer Page
Name your Retainer clearly (e.g., “Feb Weekly Retainer – Core Creators”)
Optional: banner image
Add posting expectations, deadlines, and dos/don’ts
Attach a Creative Brief (existing or auto-generated)
This communicates all requirements in one place, so creators can start without confusion.
Step 4 – Launch
After launching your retainer, the primary way to bring creators in is the Invite Creators flow, this works for both invite-only and open application retainers. If your retainer is set as open application, you also get an inbound channel via the Euka Creator App.
Option 1: Invite Creators (Works for All Retainer Types)
The Invite Creators button is the universal action, regardless of whether your retainer is invite-only or open application, you can use it to directly invite any creator you want with pre-set terms.
Click Invite Creators to open the 2-step flow:
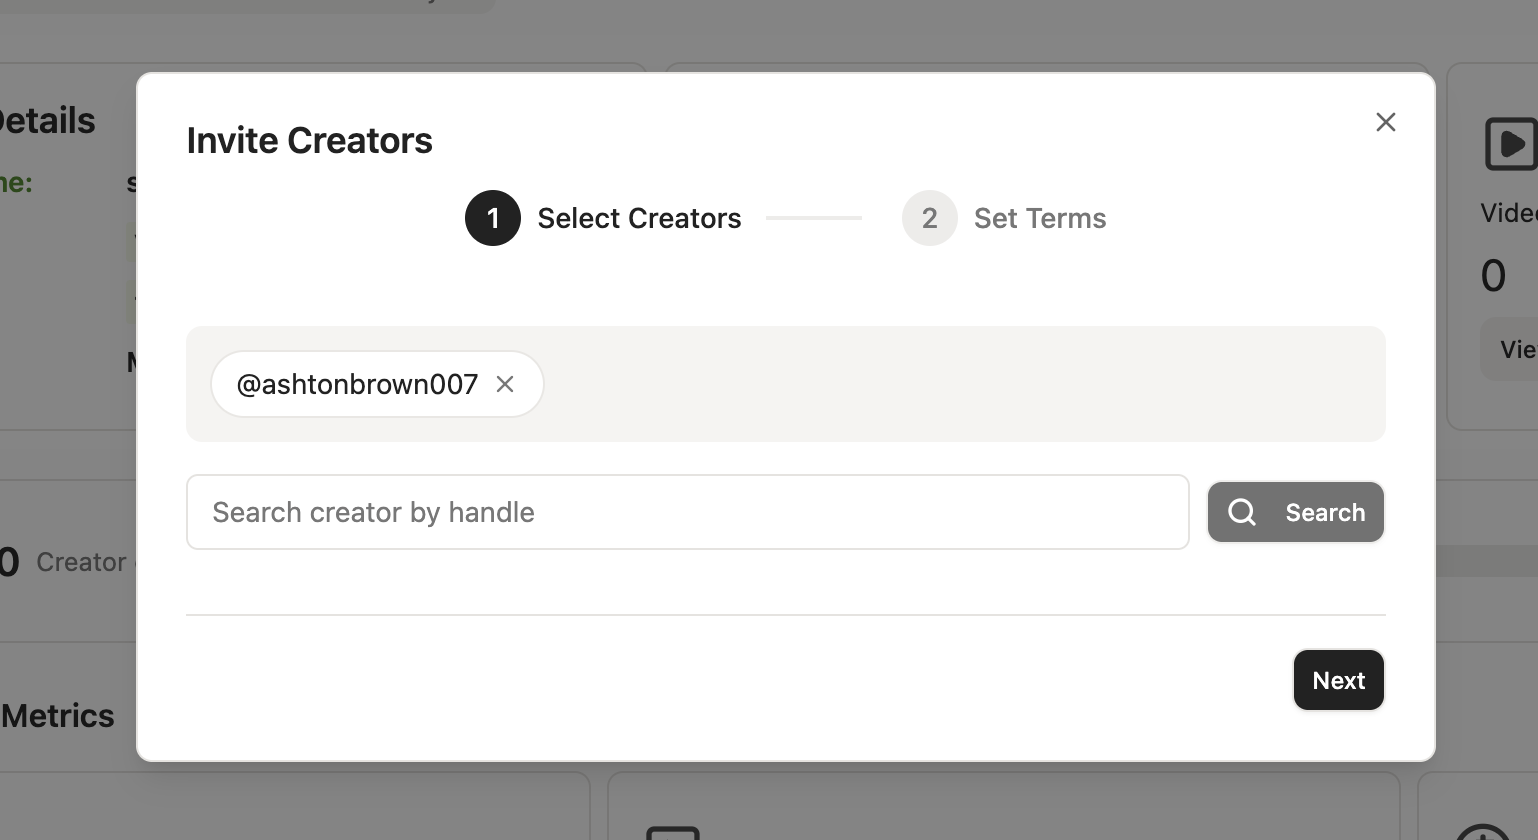
Step 1 — Select Creators
Search by creator handle in the search bar
Click the + button to add a creator
You can add multiple creators in a single invite
Click Next to continue
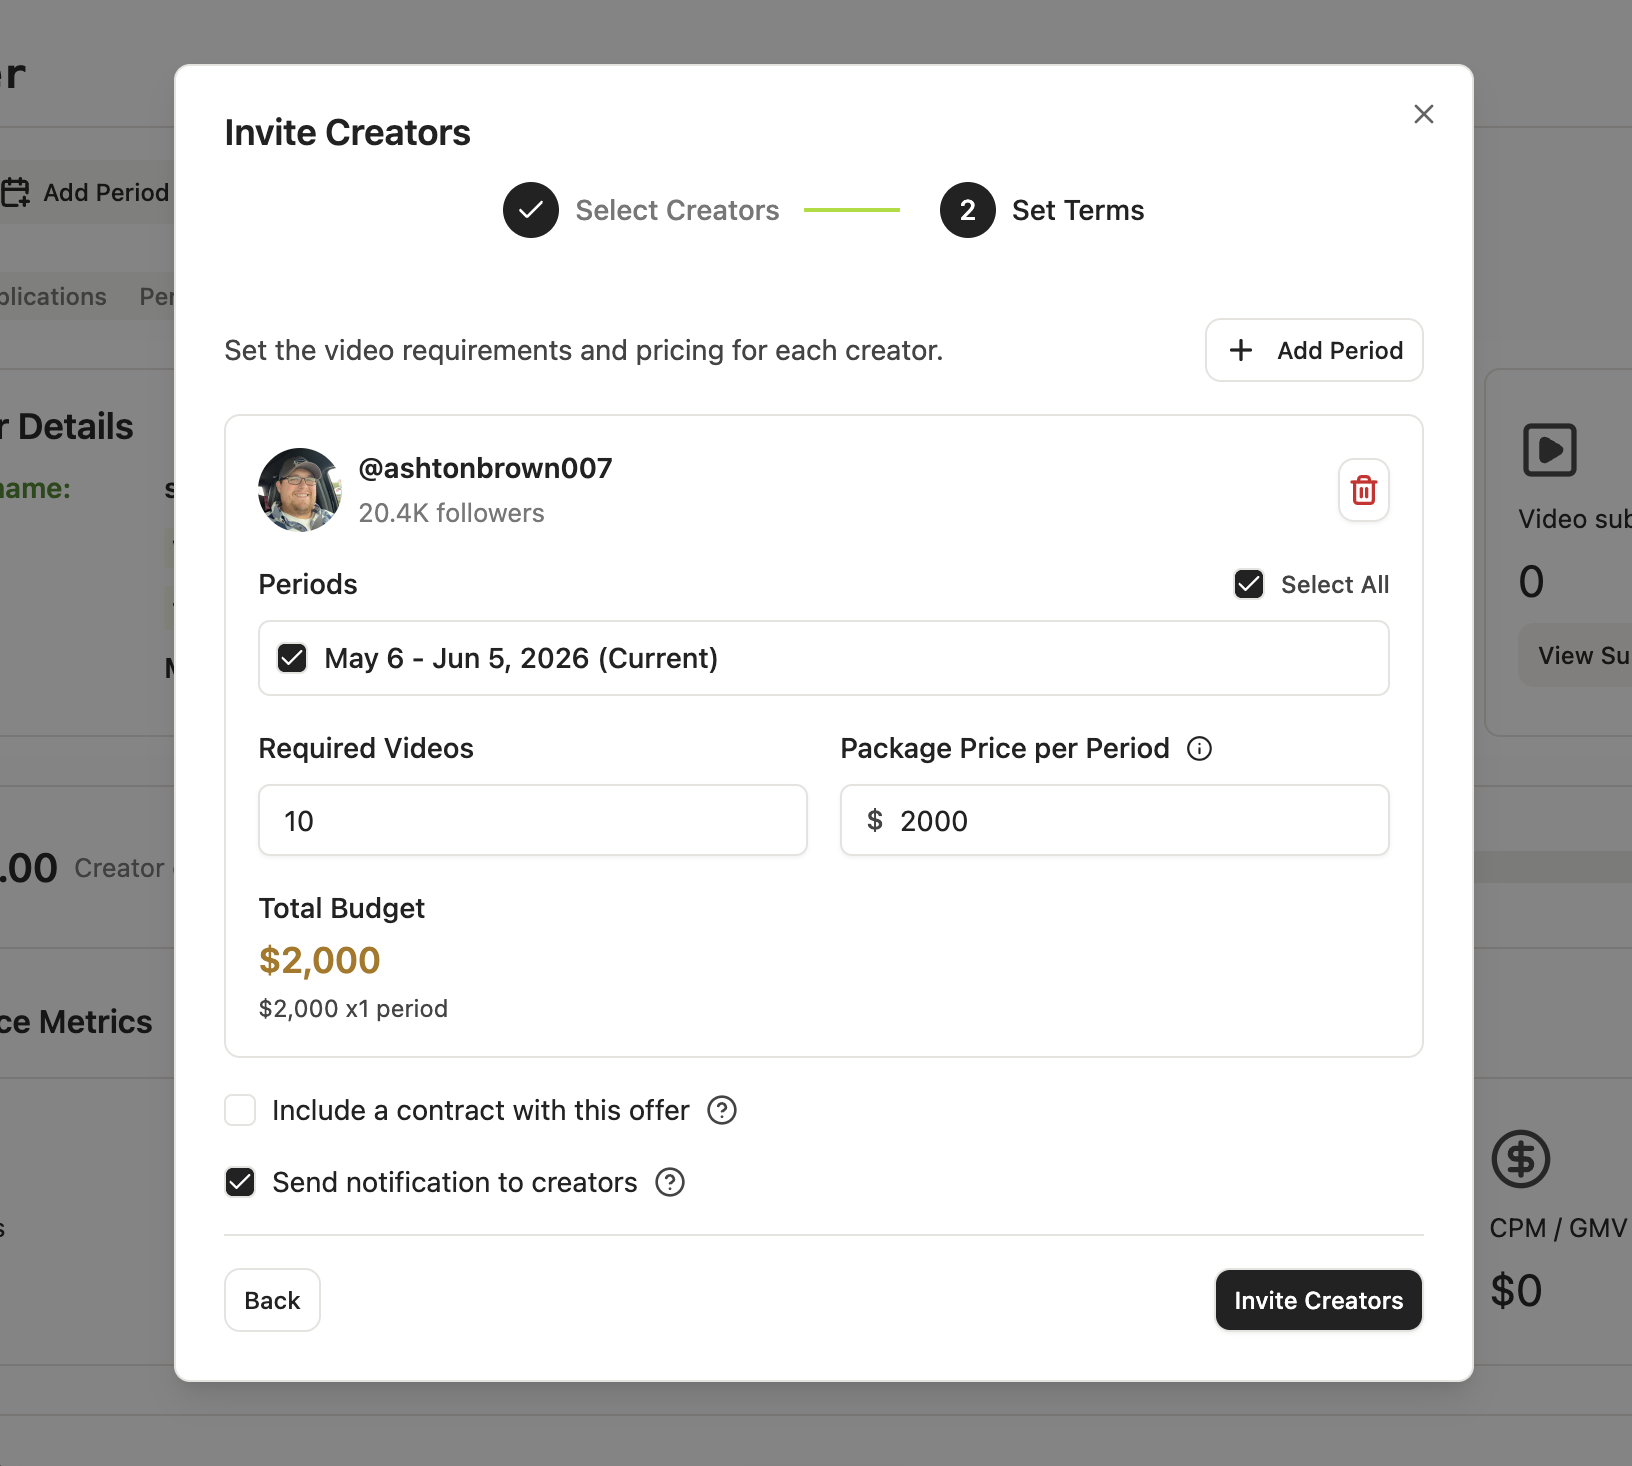
Step 2 — Set Terms
Periods — select which billing period(s) the invite applies to. Use Select All to apply to every period, or + Add Period to extend.
Required Videos — the number of videos the creator commits to delivering per period
Package Price per Period — what the brand will pay the creator per period
Optional: Include a Contract
Check Include a contract with this offer
Select an existing contract template, or click Create New
If the template has the brand as a signer, fill in the Brand Signer name and email
Counts toward your 50 contracts per billing cycle limit
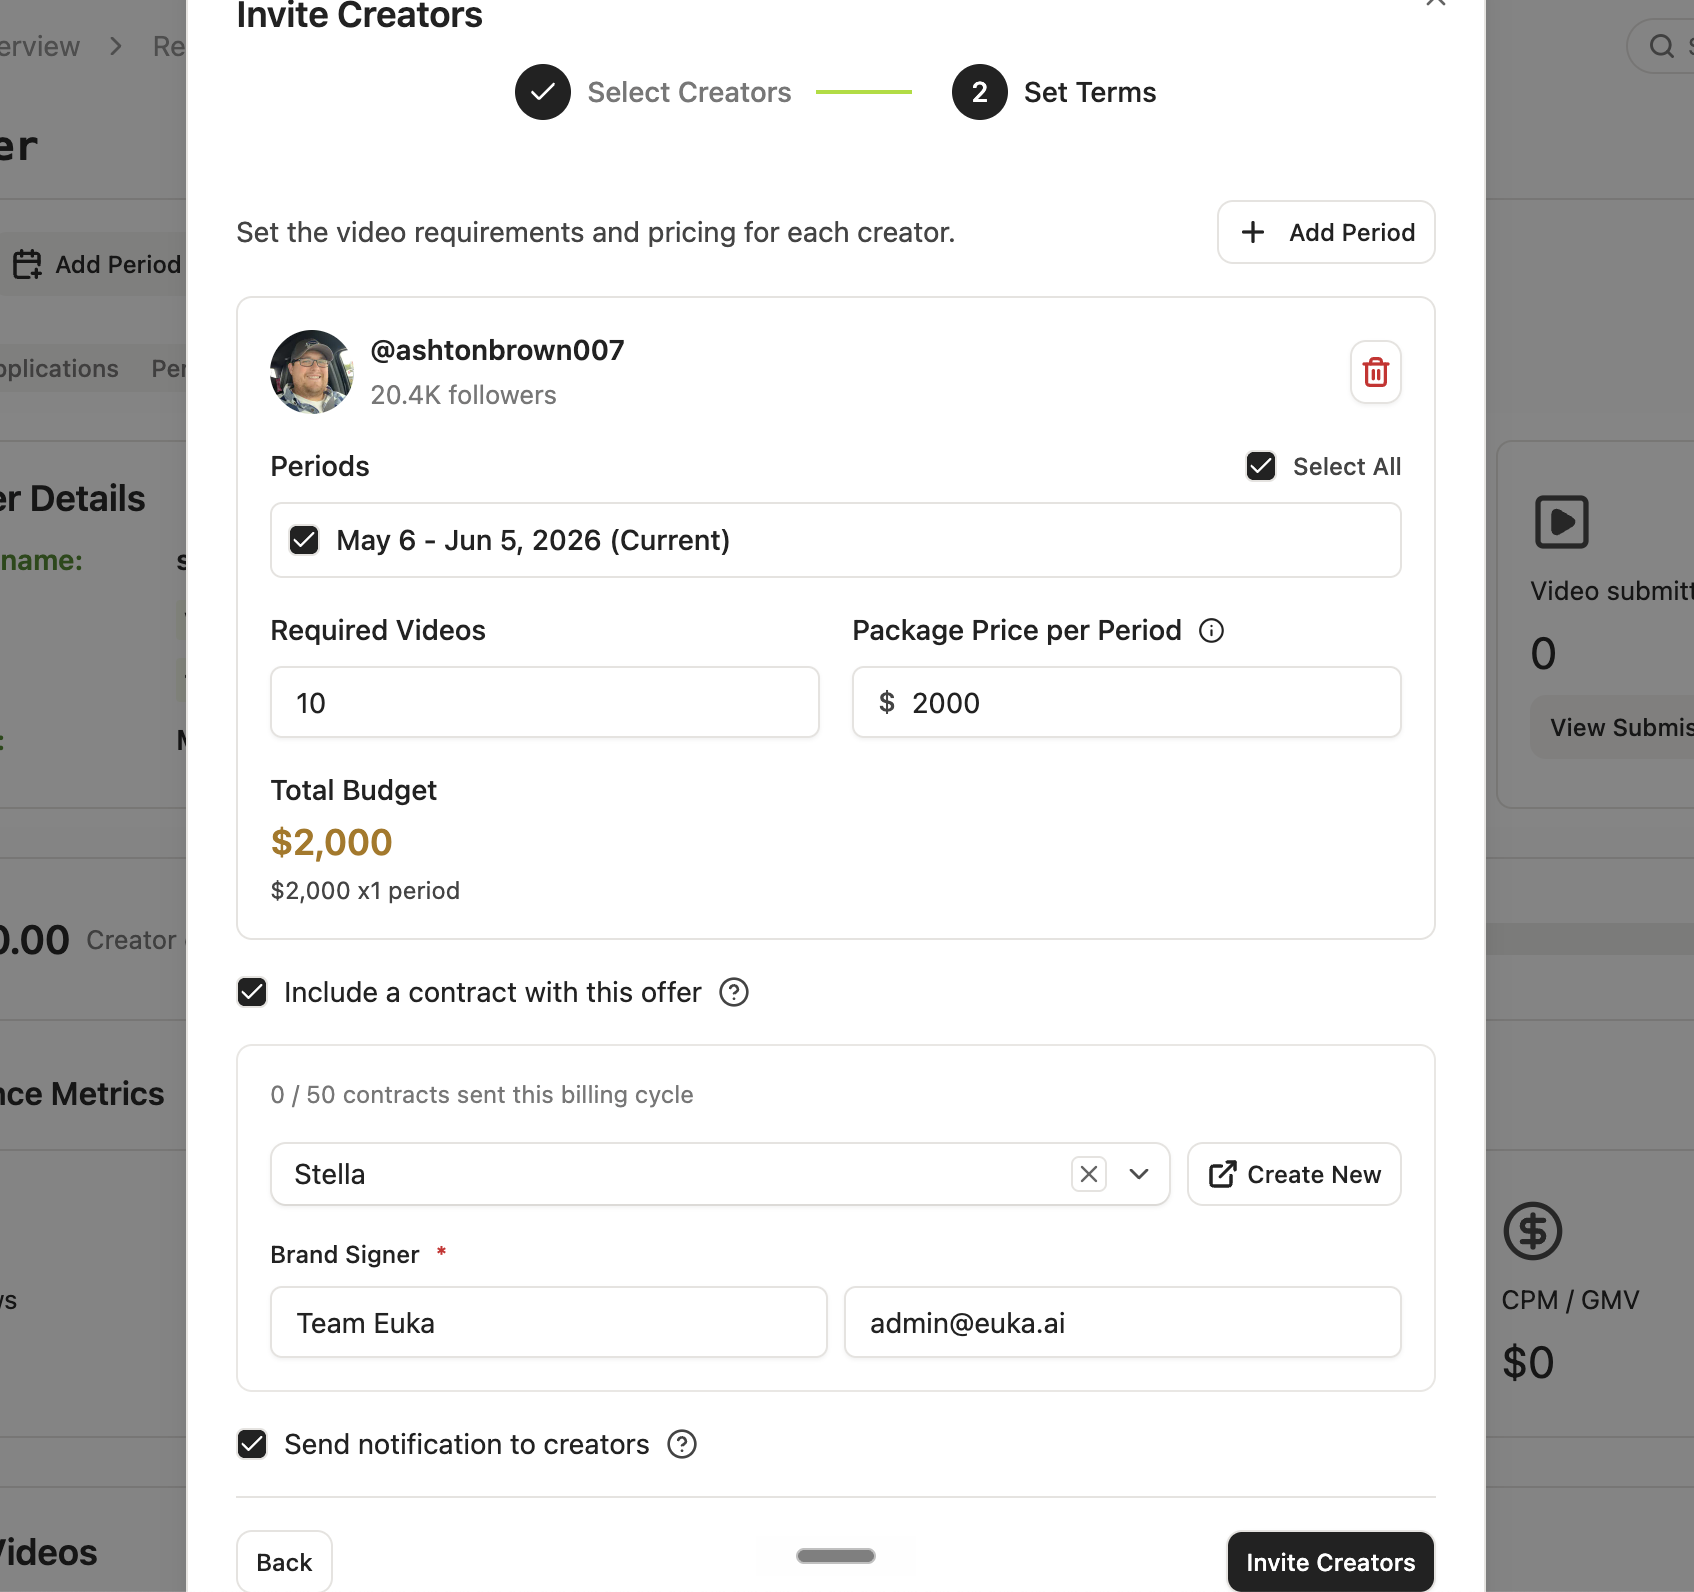
Leave Send notification to creators checked, then click Invite Creators to send.
Contract Signing Flow
If you included a contract with the brand as a signer:
Creator accepts the offer → the brand receives an email to sign the contract first
Brand signs → the creator receives an email to countersign
Once both parties have signed, the retainer is fully active and tracking begins
Option 2: Open Application (Inbound Discovery)
If you set your retainer as open application during setup, the retainer becomes discoverable in the Euka Creator App, any interested creator can apply directly.
You can still actively promote an open application retainer to drive more applicants:
Outreach Agent — start an agent targeting your preferred creator audience so they hear about the retainer and apply, make sure to include the retainer link.
Direct link sharing — share the retainer URL with specific creators to nudge them to apply:
From the retainer detail page, click View Retainer
Copy the URL from your browser
Send it to creators via DM, email, or your own channels
💡 The two channels stack. Even on an open application retainer, you can use Invite Creators to lock in specific creators at pre-set terms while open application brings in inbound applicants in parallel.
10.4 What Happens Next
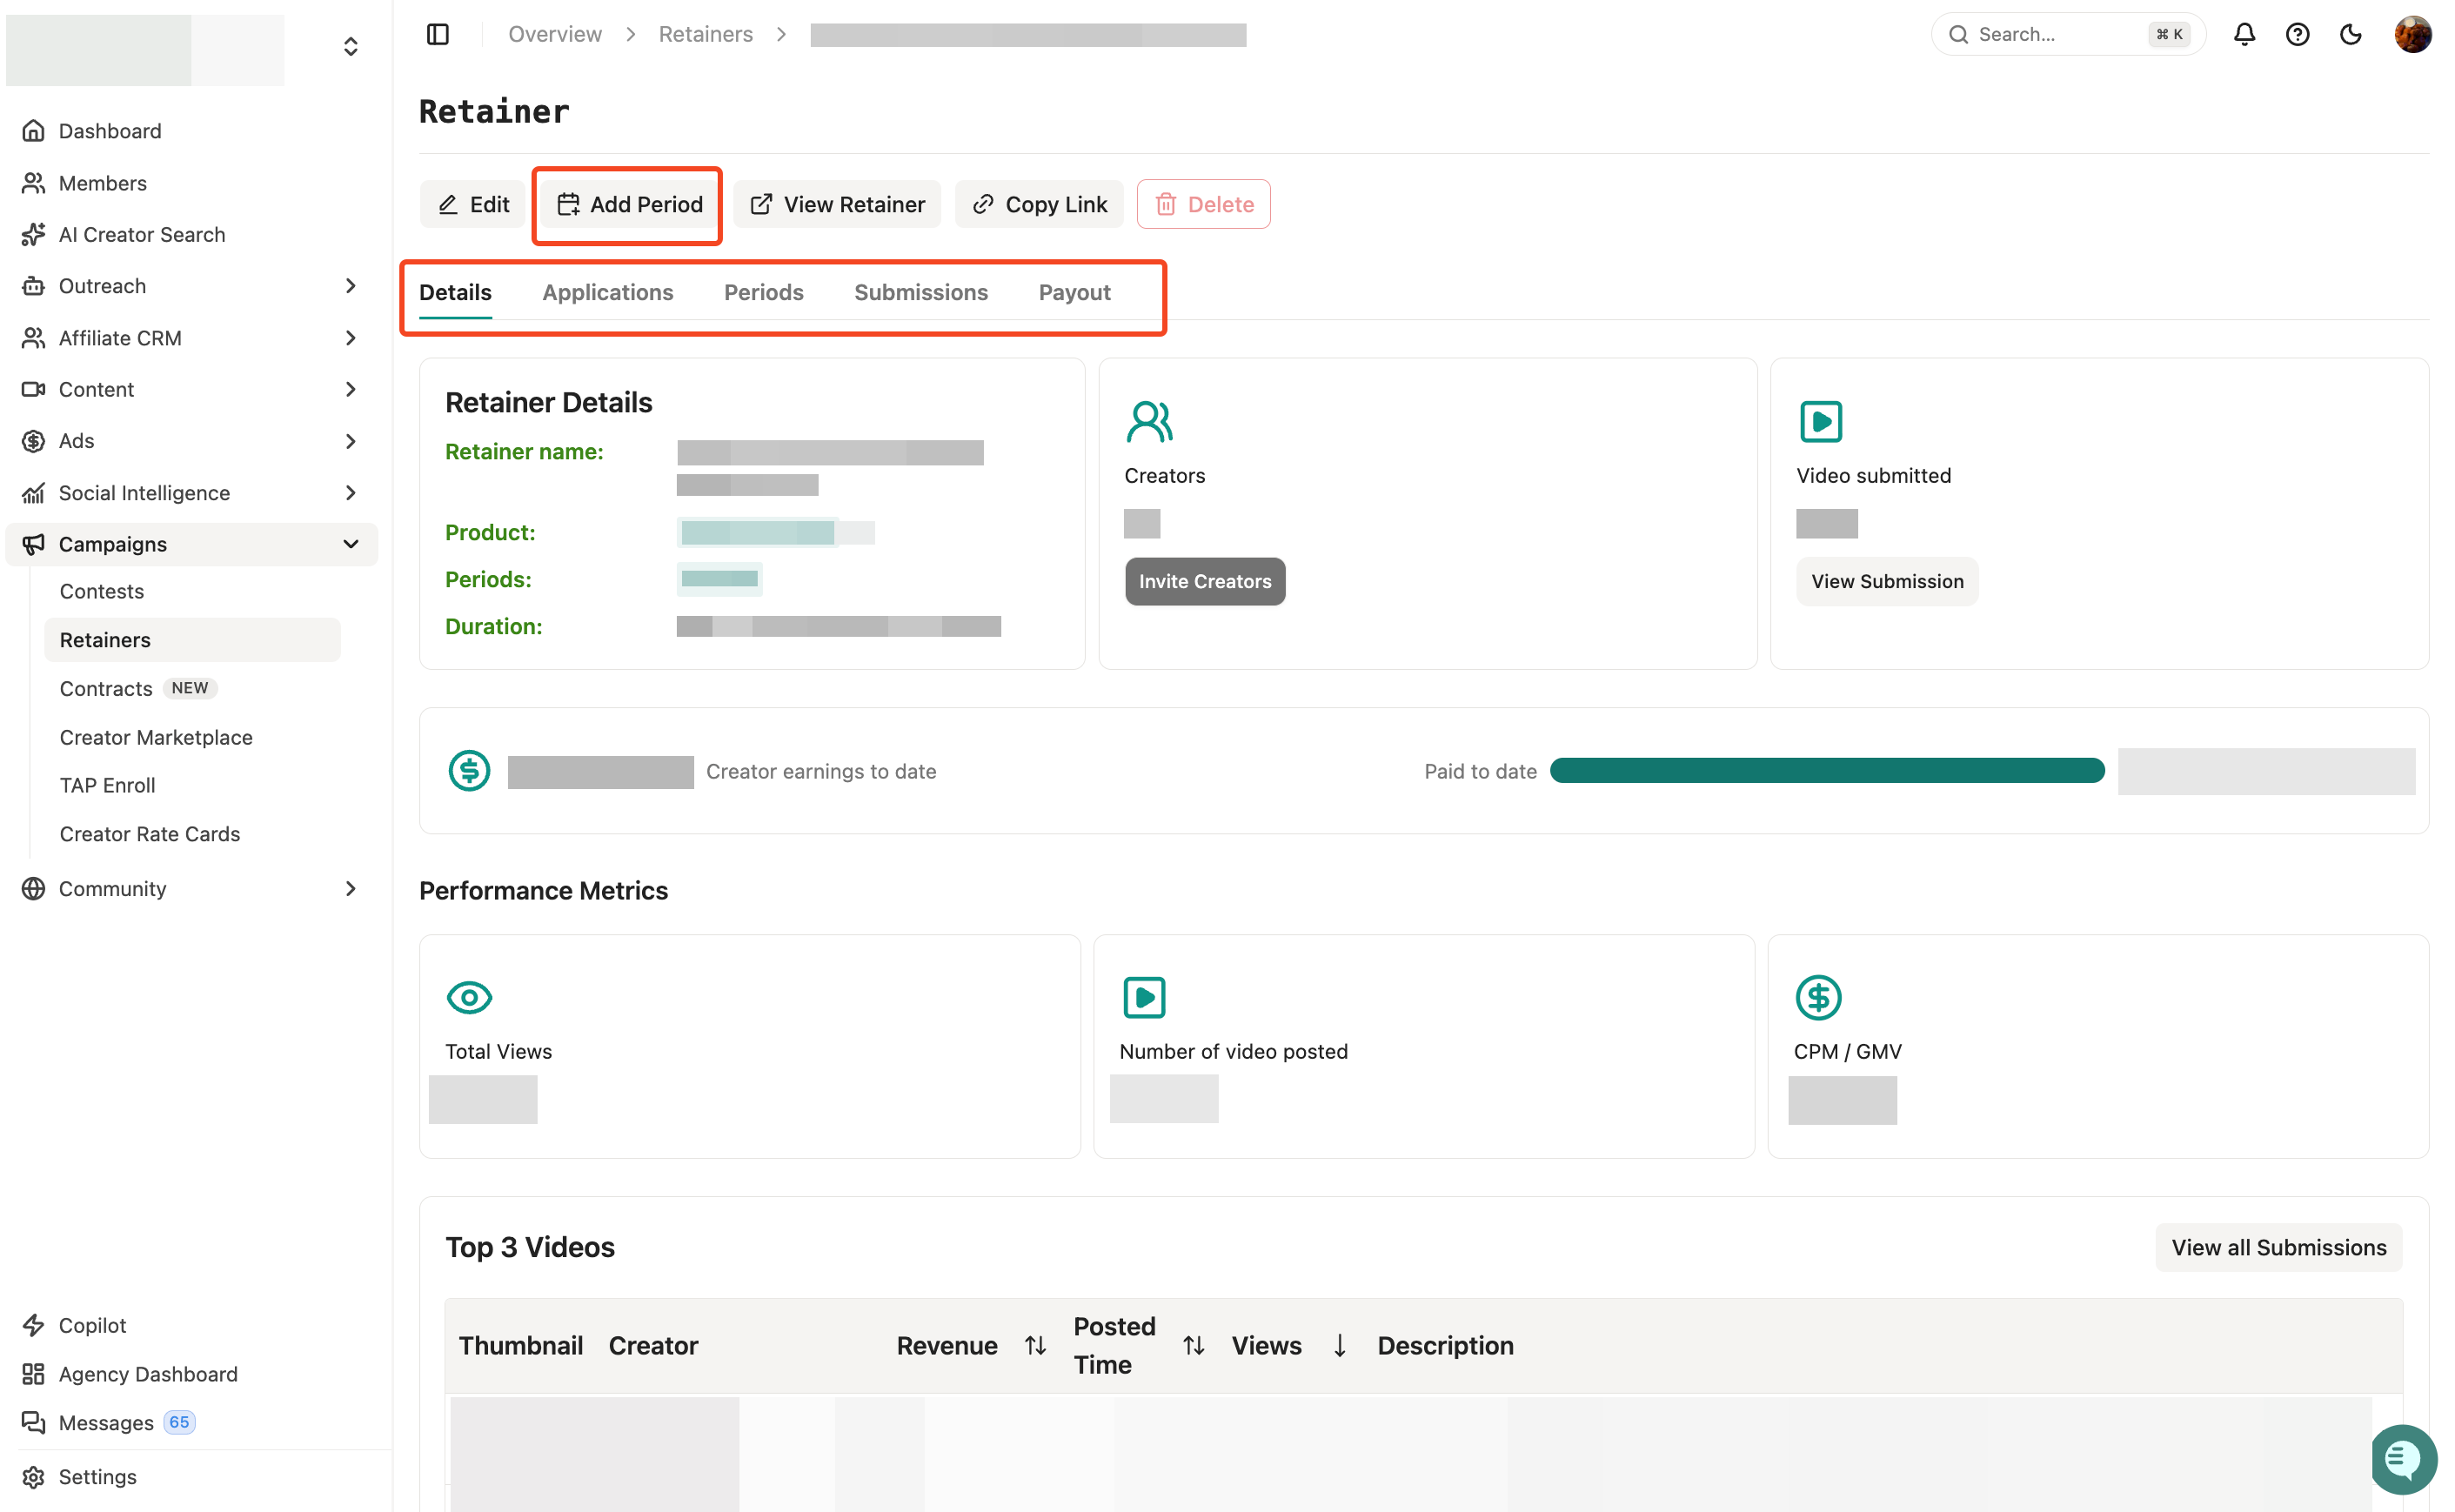
Once your retainer is live, Euka handles the tracking automatically, videos are assigned to the correct period as creators post with the selected product, and Spark Codes are captured for ad use and boosting.
From the dashboard:
Details — real-time snapshot of creators, videos submitted, total earnings, and top content. Invite more creators or copy your link from here.
Applications — manage creators across five stages: Applied, Offered, Accepted, Declined, and Rejected. Edit offers or use GMV (30d) to decide who to move forward.
Periods — per-creator breakdown of task completion, views, GMV, and payment. Expand individual videos and disqualify any that don't meet requirements.
Submissions — full log of every video posted, sortable by revenue, views, and post date. Export as CSV for reporting.
Add Period — extend the retainer into a new cycle, each with its own deliverables, videos, and payments.
No manual tracking, predictable content cadence, and everything in one place.
10.5 Steps to Pay Creators (Retainers)
Go to Retainers dashboard → Periods tab → Click "Pay Creators"
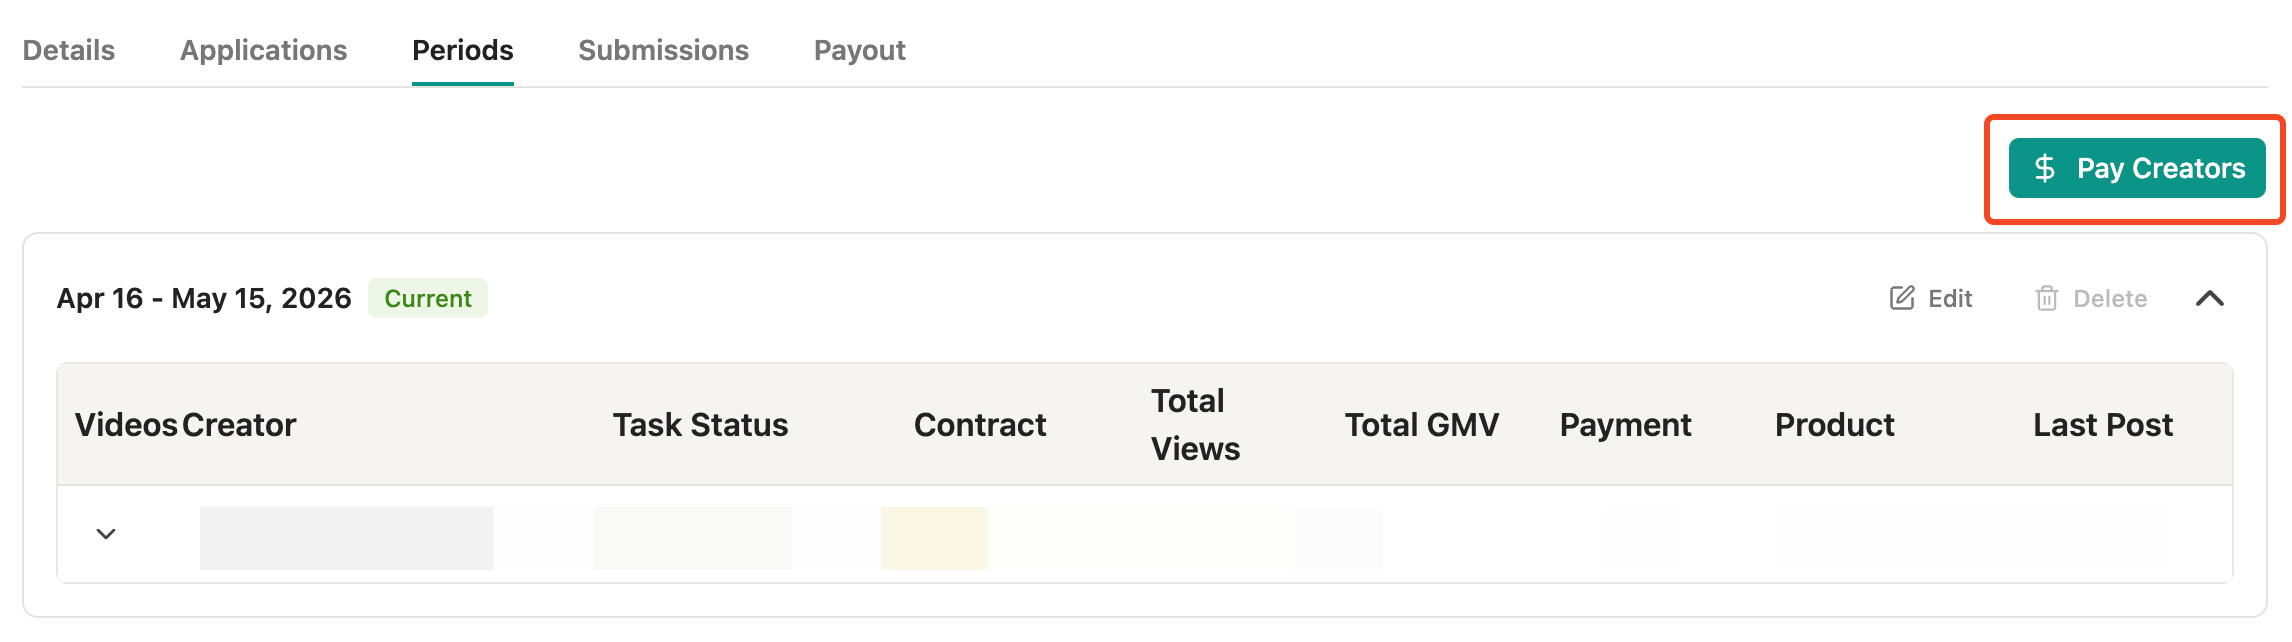
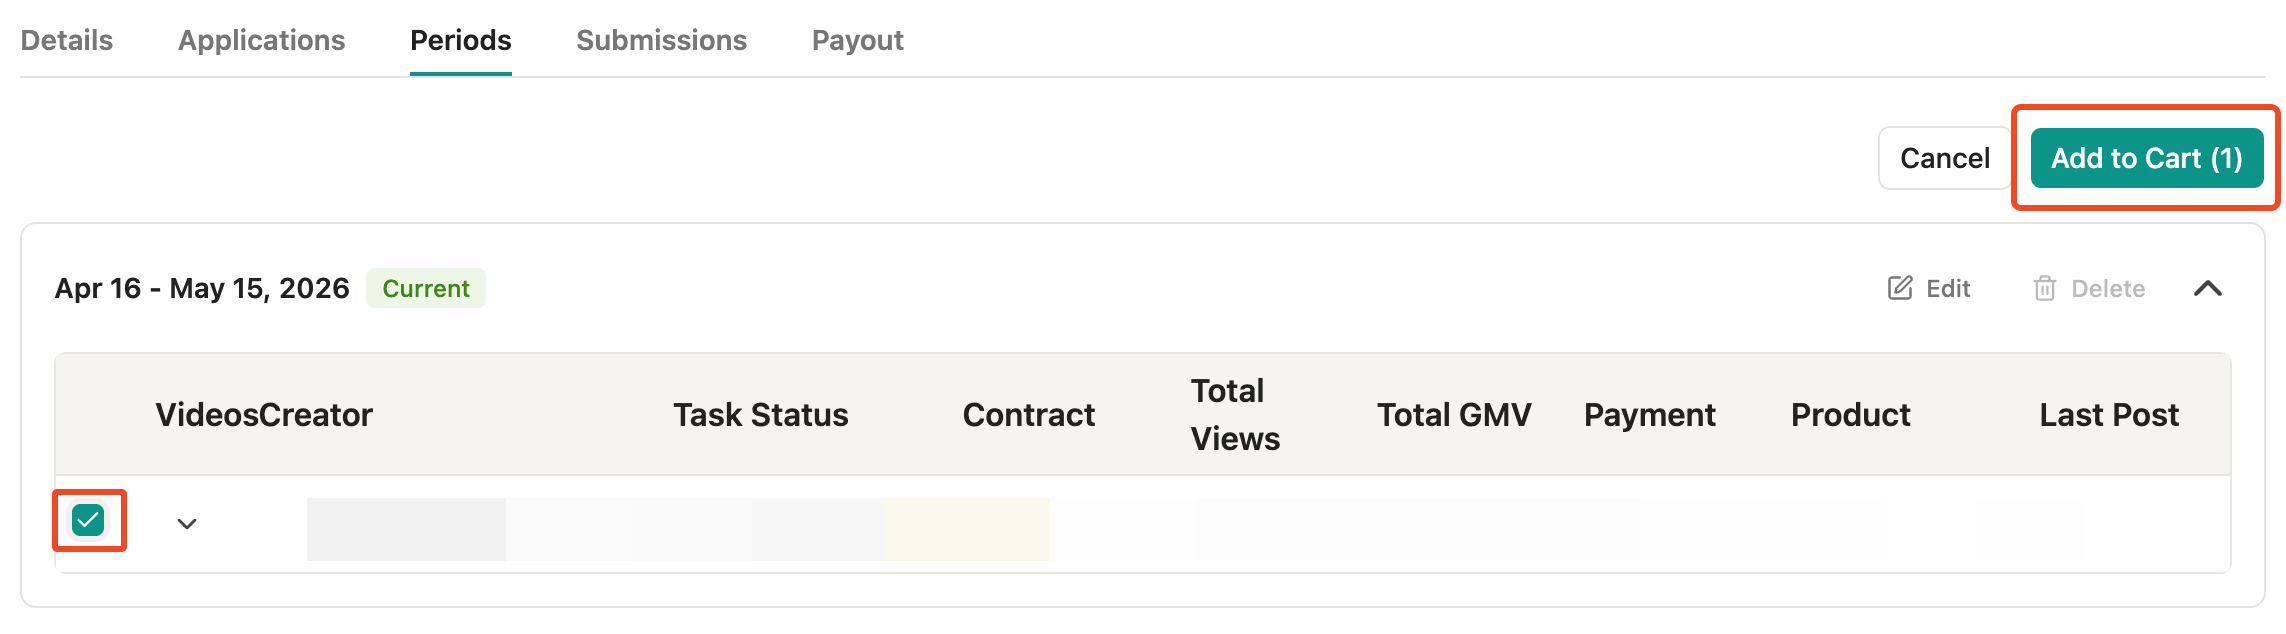
Expand the period and select creators via checkboxes
Click “Add to Cart” and confirm in the modal
Switch to the Payouts tab
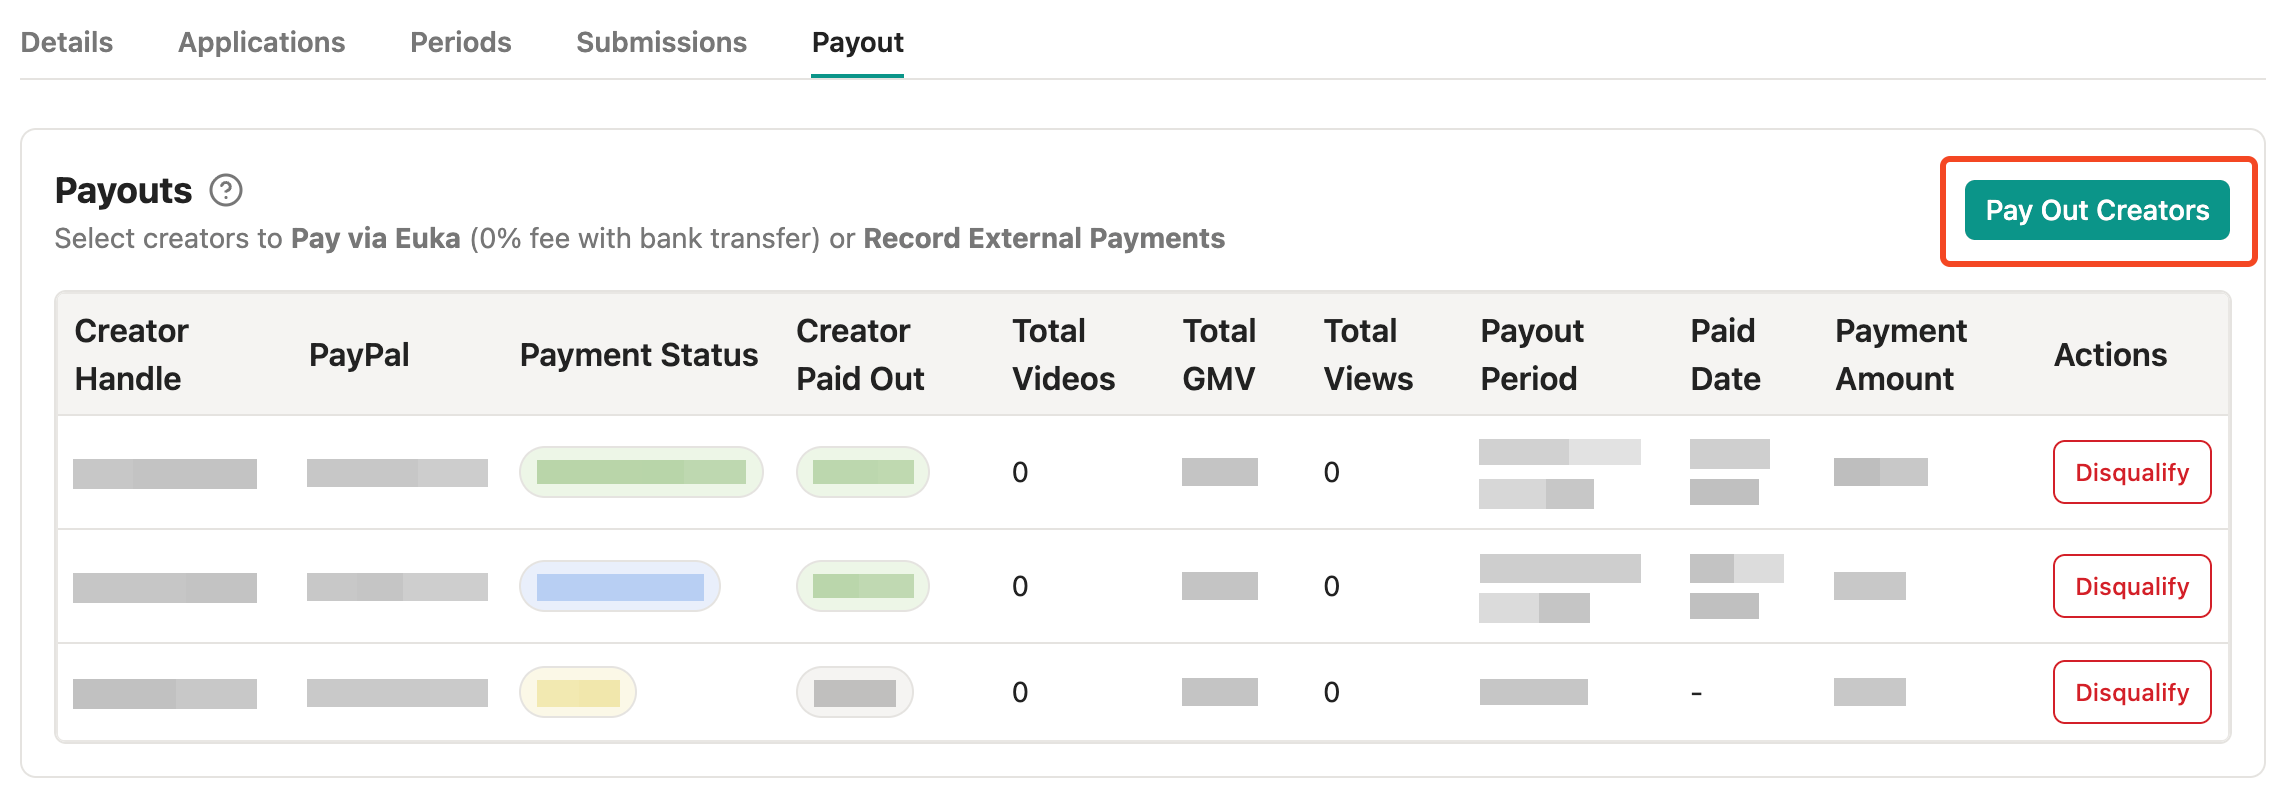
Click “Pay Out Creators”, and select pending payments
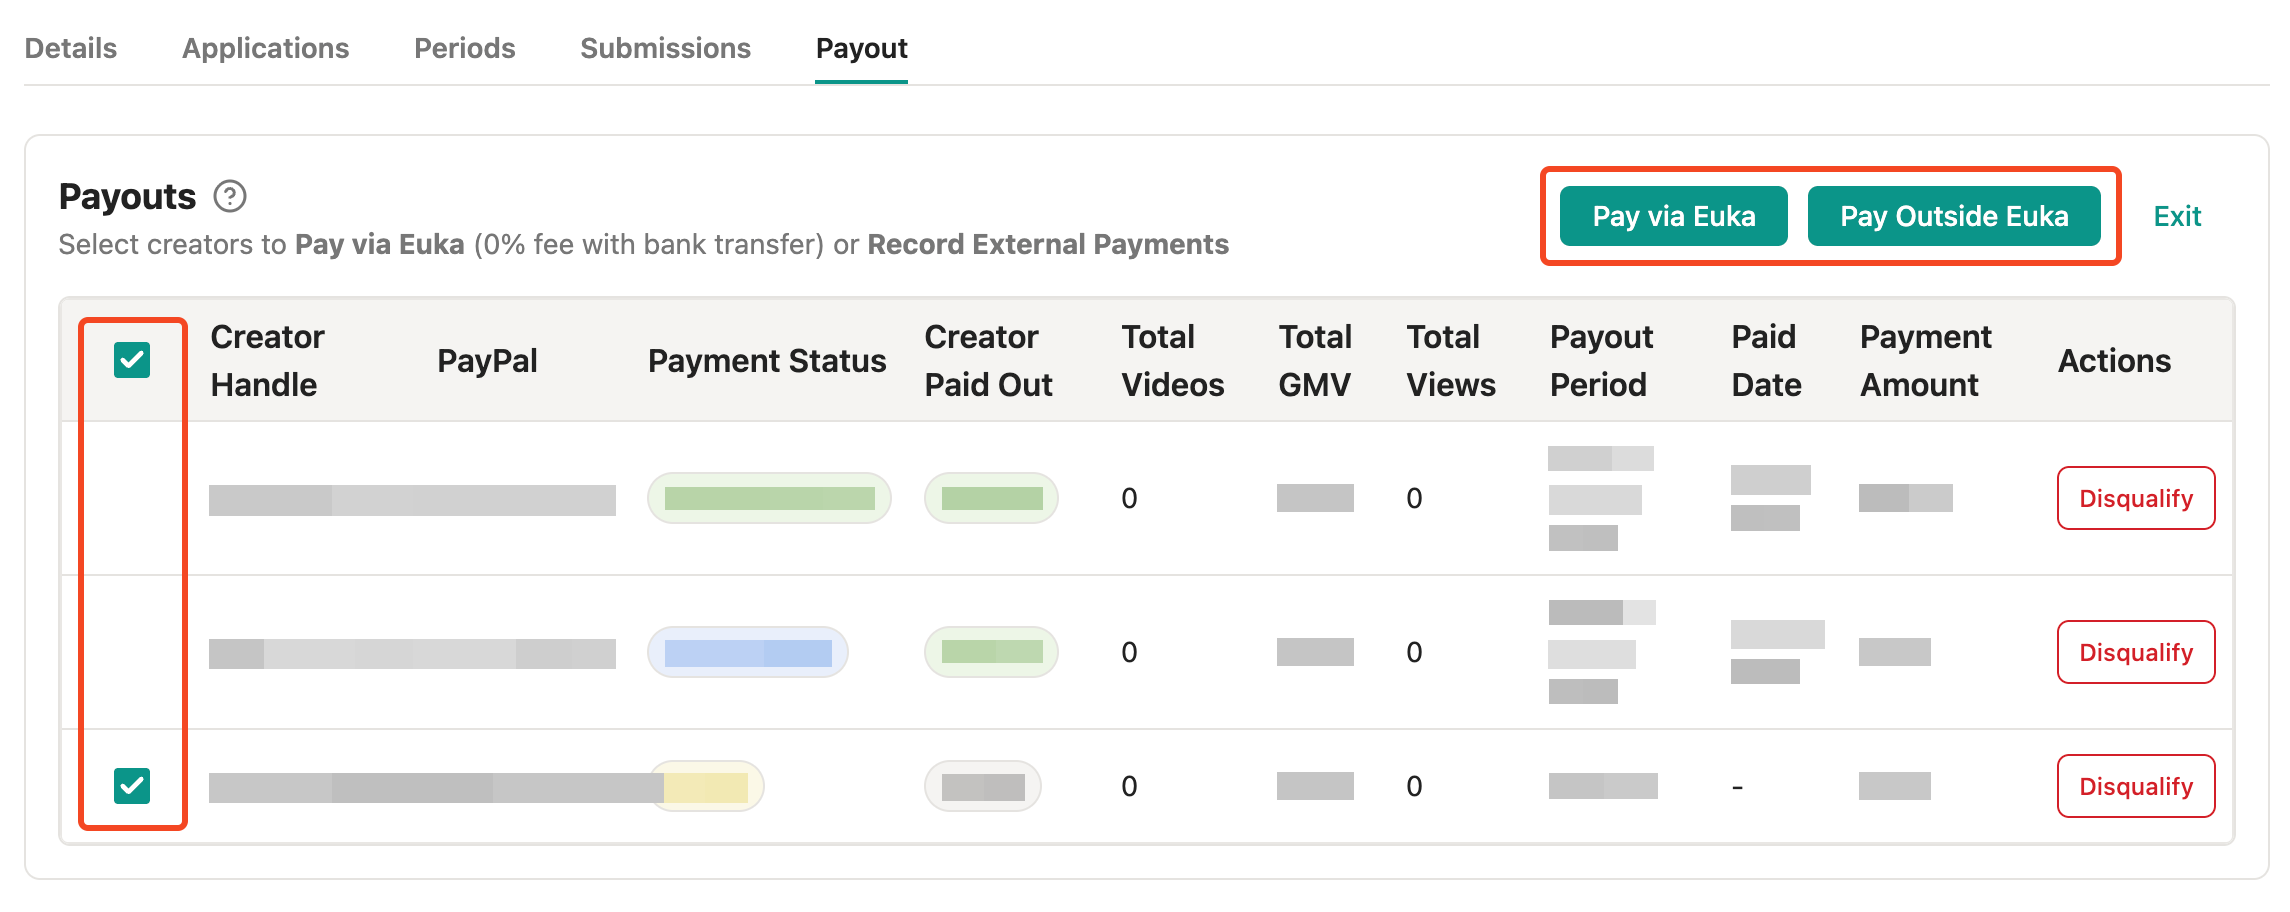
Choose payment method:
Pay via Euka: Card (5% fee)
ACH (free, 3–5 day settlement)
Key Constraints
You cannot pay the same creator for the same period twice
Payments are adjusted for disqualified videos (reduces amount)
10.6 How Creators Receive Payment
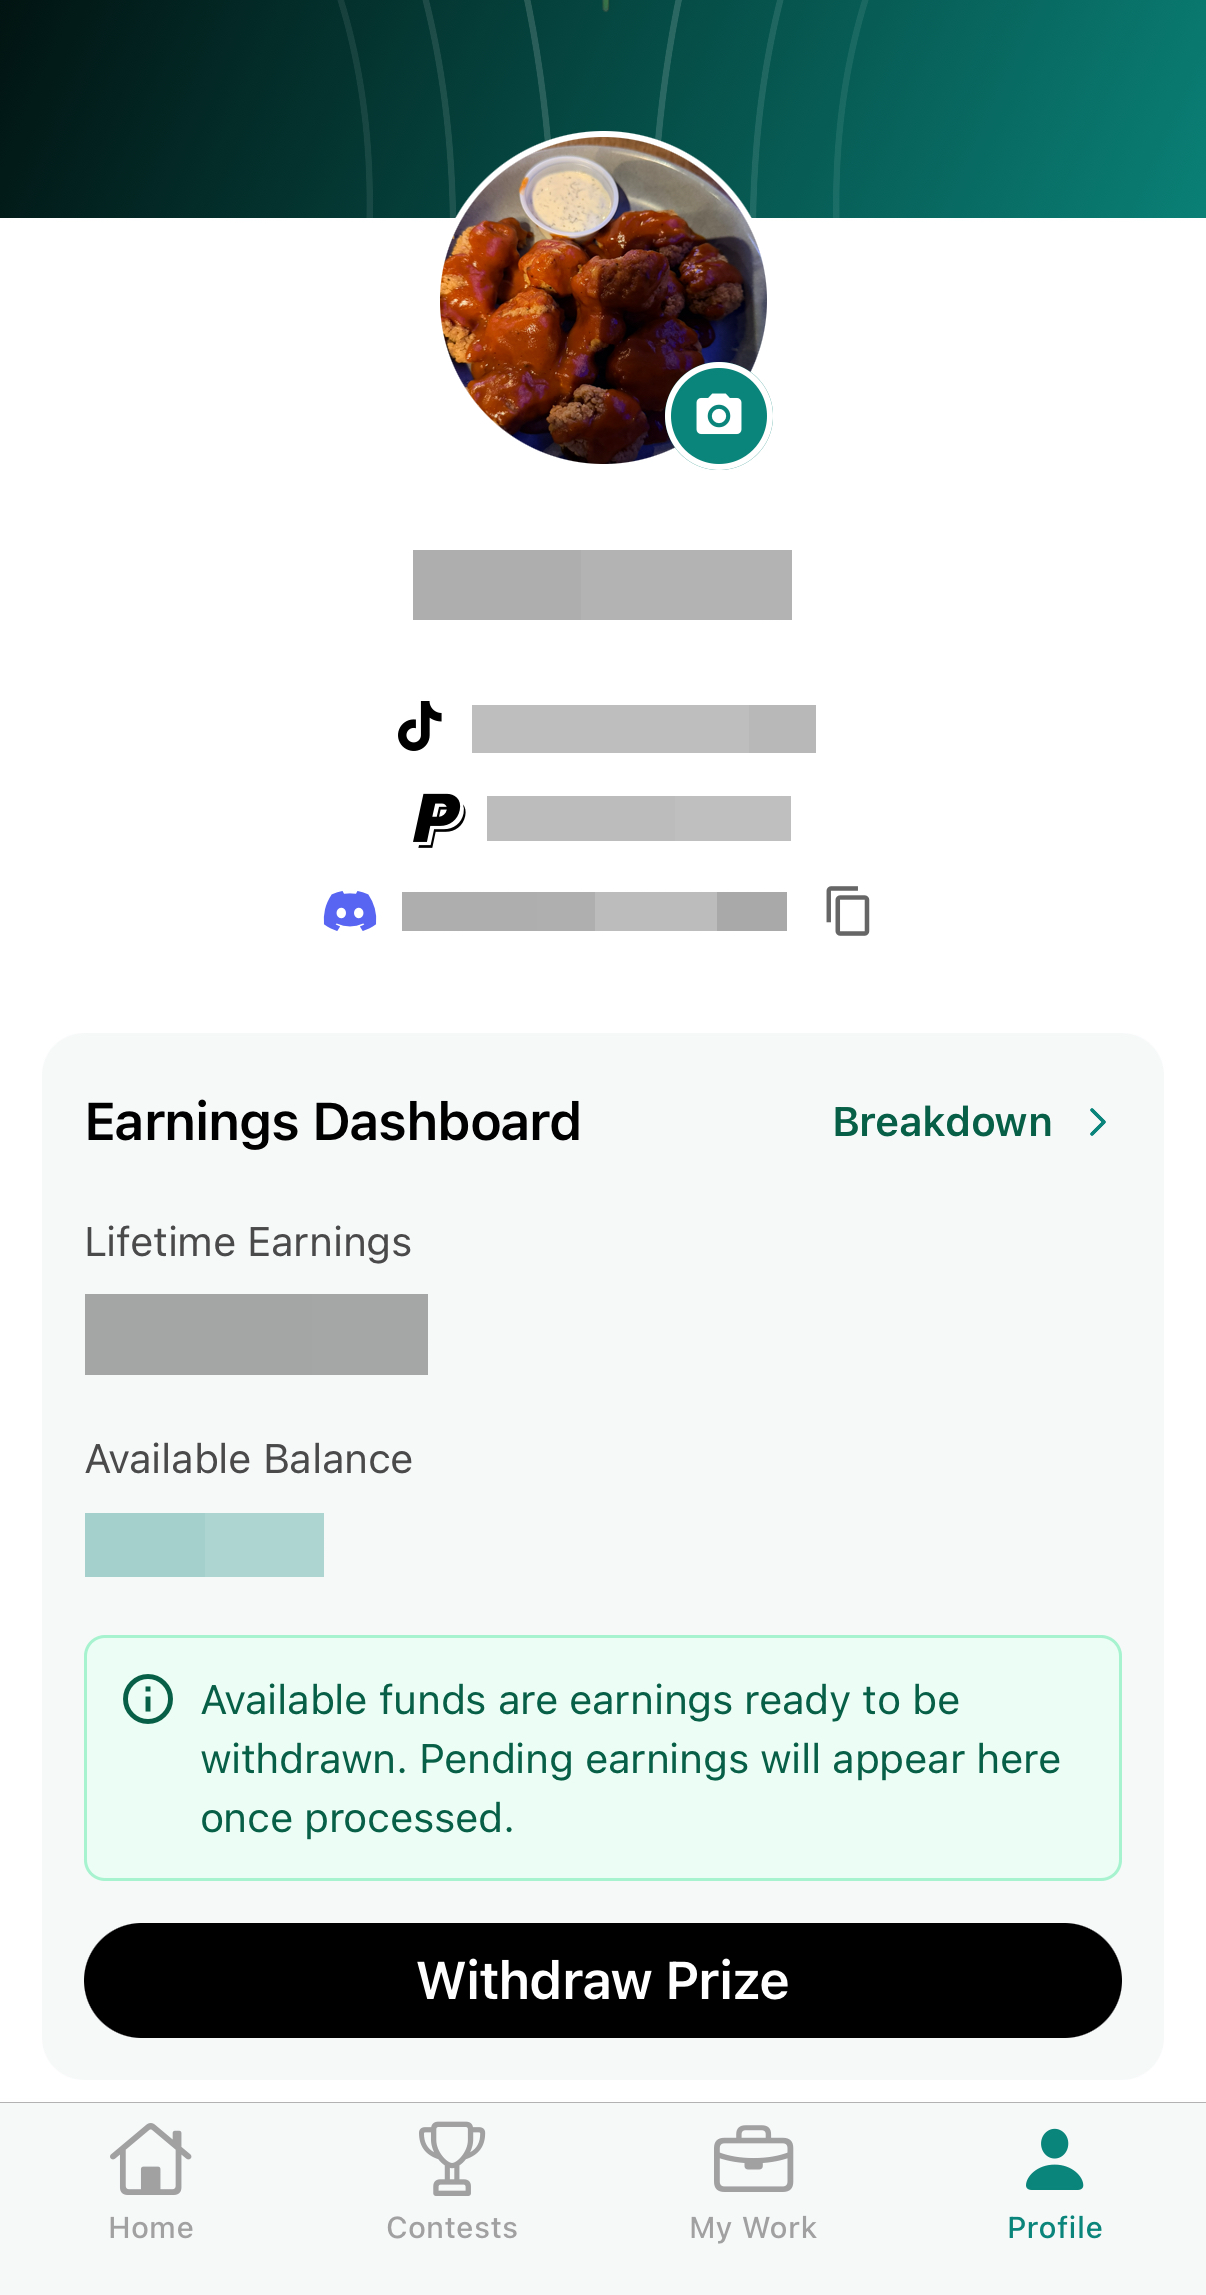
Creators enter their PayPal ID when they accept the retainer offer
→ They can update it in settings anytimeOnce the brand completes payment (usually by card via Stripe):
Funds are instantly available in the creator’s account
Creator gets an email notification
Creator logs in, views balance, and clicks “Withdraw”
Money transfers to their PayPal account
PayPal sends a payout notification email